Make your announcements bigger, bolder, brighter, and shinier.
- Give the important details a lustrous sheen
- Printed on thick, premium 16 pt Cardstock
- Add spot UV coating on one or both sides
- Available in standard to smaller
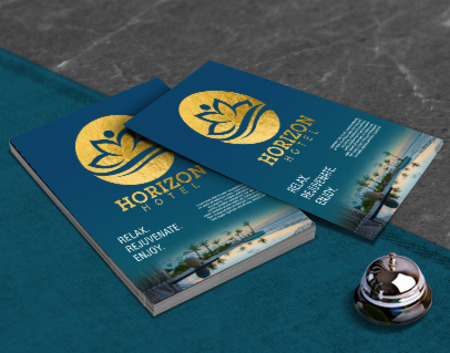
Dare to Distinguish Yourself With Metallic Flyer Printing
The flyer's lustrous, metallic sheen draws a customer's attention to the important details. The metallic foil highlights a sale discount, event location and time, or your company's new logo.
Show Off With Shine
A metallic foil flyer gives a shiny, metallic accent to the one or both sides of your design. Choose from five sophisticated shades: gold, silver, copper, black, blue, or red. Add a luxurious touch to your premium brand's product launch details or bring in the holiday cheer with these extra dazzling colors.
Don't limit yourself to one or two shades. You're free to include your own gradients and add several colors of foil on the same side.
Elevate Your Elegance
Complement the metallic sheen with a few spot UV elements on the other side of your custom flyers. Spot UV printing applies a high gloss layer on a specific area of the flyer. Its extra shiny surface adds to the festive or luxurious branding of your entire design. You can choose to have spot UV printing on the front, back, or both sides.

Your flyer design is printed on 16 pt Cardstock, which is our thickest and most premium material available. Its substantial weight allows for spot UV and metallic flyer printing on both sides.
Get With the Gloss
We help you set the standard for sophistication with two premium coating options. Both provide high levels of shine that match the luxury of your metallic foil flyer design.
High gloss UV
- Applies the ultimate shine and high reflectivity
- Colors come out in full detail
- Abrasion resistant and able to withstand frequent handling
- Perfect for handing out in high-traffic areas
Gloss UV
- Makes every color pop
- Provides the right amount of shine
- Fingerprint resistant
Go From Slim to Standard Sizes
We offer a wide range of promotional flyer sizes that are both handy and easy to store. Select a size that suits your flyer design and makes the most out of the metallic foil elements.
- 8.5" x 11" is the most popular size for flyers, with ample space for a central or several imagery elements.
- 6" x 9" is easy to hand out and for customers to keep. You can highlight an image, company logo, or a big announcement in metallic typography.
- 5" x 7" is one of the smaller sizes available. It's perfect for announcements highlighting a major sale or an upcoming event.
You could also add rounded corners to give your flyers an extra distinctive design.
PrintPlace makes it easy to set up your metallic flyer printing. Upload your flyer design online or download one of our templates to get you started.
Q&A
Q: What are the best ways to design a metallic flyer?
A: Metallic flyers give you every opportunity to stand out. Here are a few tips to keep in mind while creating your design:
- Have a clear focal point. The flyer should immediately shift the customer's focus to your main point.
- Use attractive and functional imagery. People register visuals over text. Your flyer should have graphics or images that show them what the announcement is all about.
- Strike a balance. Don't overdo the application of metallic foil or spot UV printing in your design. Sometimes less is more, so you could have a few words or images in metallic foil. Have one central image or typography in metallic foil. This allows the gloss coating to contrast the shine.
Q: By when can I expect my metallic flyer order?
A: The "ready to ship in time" refers to the time it takes to produce your order. Standard business cards can be ready for shippingafter 7 business days. Input your zip code at the bottom of the calculator to find out the exact date of arrival.
Metallic Printing File Requirements
Keep in mind the following file requirements below as you create a design using our downloadable templates:
- The font size should be a minimum of 7 or 8 points. Avoid printing small text or fine lines in metallic.
- Border and stroke must be more than 1.5 points.
- Images and artwork should be at least 300 DPI.
- All files should be in CMYK color mode.
How to Prepare Your Design for Metallic Printing
- Apply metallic printing on lighter colors. The effect won’t be as apparent in darker colors.
- Create two layers to distinguish the elements printed in ink from the elements with metallic printing. Both files should have the same size.
- The regular CMYK layer shows which elements are printed in ink. Apply 15% K on the area that will be printed in metallic color.
- The metallic printing layer only shows the elements that will appear as metallic. The element(s) that will be printed in metallic colors should have the same location as seen on the CMYK layer. Apply 100% K on the metallic area and white on the areas with no metallic printing.
The images below show the difference between the two layers:


- Alignment is crucial to the file preparation process. The CMYK and metallic printing layers should both have the same size. Common elements must be in the same position on both layers.
- Check for a white "halo" around the knockout area or where two colors overlap on the layer. To prevent this effect on the CMYK layer, grow or stroke the metallic area in mask by 1 point. This allows the metallic silver to blend with the CMYK area, which reduces the appearance of a halo. Alternatively, you can add more color to the knockout area to reduce the halo effect.
How to Add Spot UV Elements to Your Artwork
You can also print artwork with both metallic and spot UV elements.
This requires a third layer that shows the spot UV areas, which you can create through the following steps:
- Apply a 100% K to the areas with spot UV printing.
- Make sure the spot UV layer has the exact same size as the CMYK and metallic printing layers.
- On the CMYK layer, add a 1/16” gap between the spot UV and metallic areas.
