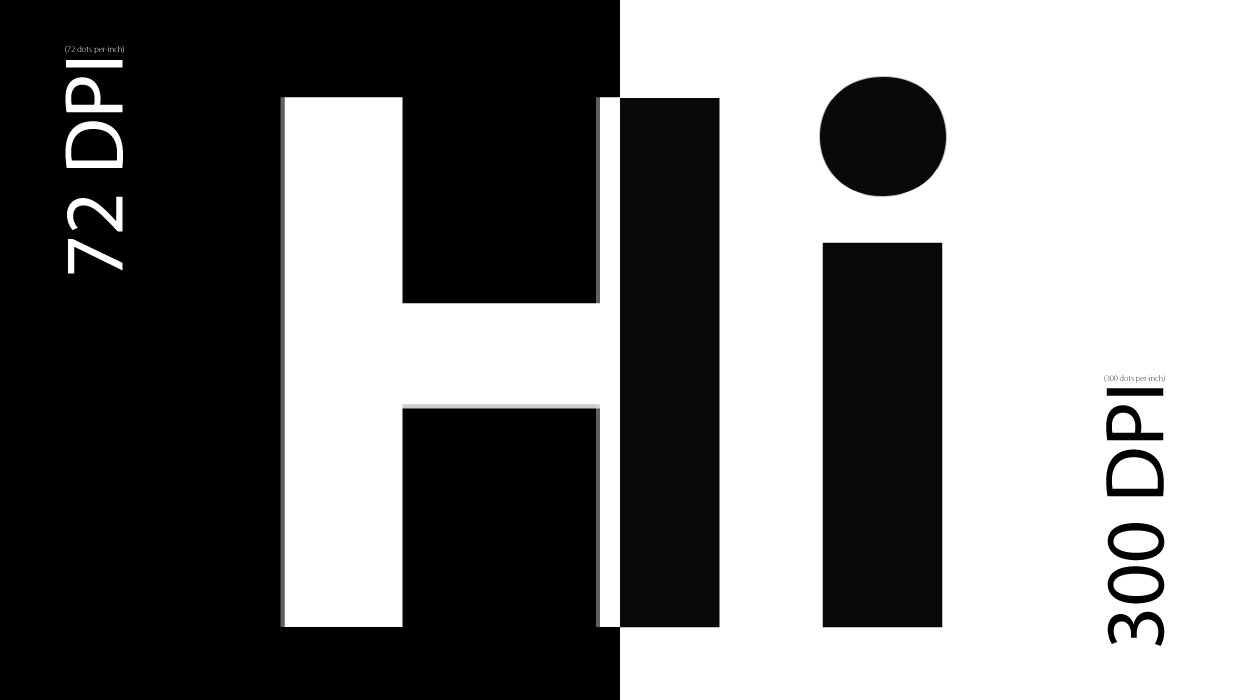
What Is DPI?
One unavoidable question we keep getting is “what is DPI”? Printing online has never been simpler, but it’s important to understand DPI and other related ideas to help you prepare your file for printing.
Most designers can tell you that DPI stands for “ dots per inch” and the higher the DPI the better the print quality.
This is mostly true, and this is what most laymen really need to know. But it’s only true to a certain extent and in very specific instances — which we will discuss below. There’s a lot of confusion on the subject and a lot of otherwise excellent designers have a flawed understanding of the concept.
Here’s a guide to understanding DPI and how it can affect your print projects on your home printer, as well as those you send to a professional printing company.
What Is DPI?: The Technical Definition
via Micrographia.com
DPI stands for “ dots per inch ” It refers to the number of ink or pigment dots per given linear inch of print. DPI is a worldwide standard for measuring print density. Interestingly enough, it’s even used in countries that have adopted the metric system. Generally speaking, the higher the DPI, the finer the details in your final print.
While often confused with it, DPI is not a direct measure of print resolution , which is the actual or approximate number of “ink dots” in the entirety of a given image, regardless of size. It is also not the same as “dots per square inch”. A 300 DPI print will have 300 x 300 dots, for a total of 90,000 dots of pigment in a square inch.
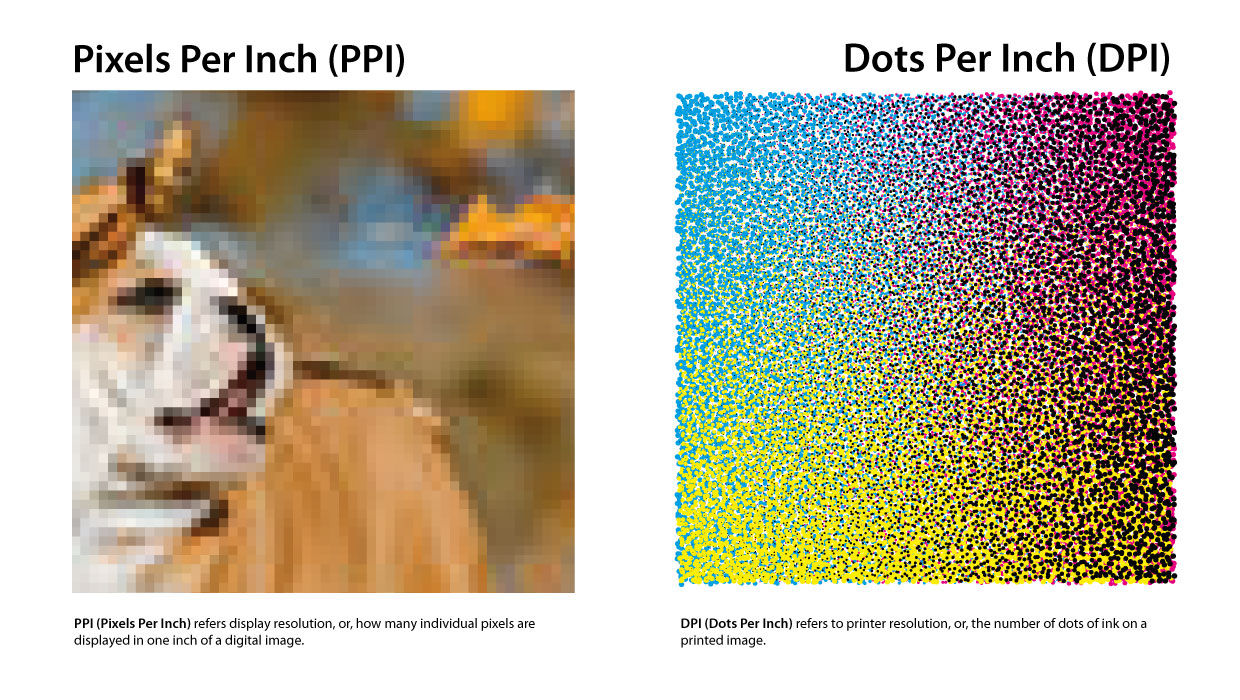
To make things even more confusing, PPI (pixels per inch) is often what many people are referring to when they talk about DPI. This makes it worthwhile to discuss PPI and how it relates to DPI.
DPI vs PPI
While DPI and PPI are related concepts, and are often interchangeable in daily conversation, strictly speaking they are not the same thing. This confusion is so pervasive, even seasoned graphic designers often confuse DPI with PPI . Ask most amateur graphic designers “what is DPI” and chances are you good you’ll be given a definition of PPI instead.
Strictly speaking, PPI measures pixel density , as used on monitors on computers and other devices. Like DPI, PPI is also mistaken to be a measurement of screen resolution . It isn’t. Resolution refers to the actual number of pixels in a given image, sometimes according to width and height. PPI also an important metric for rasterized images, which we’ll get into later.
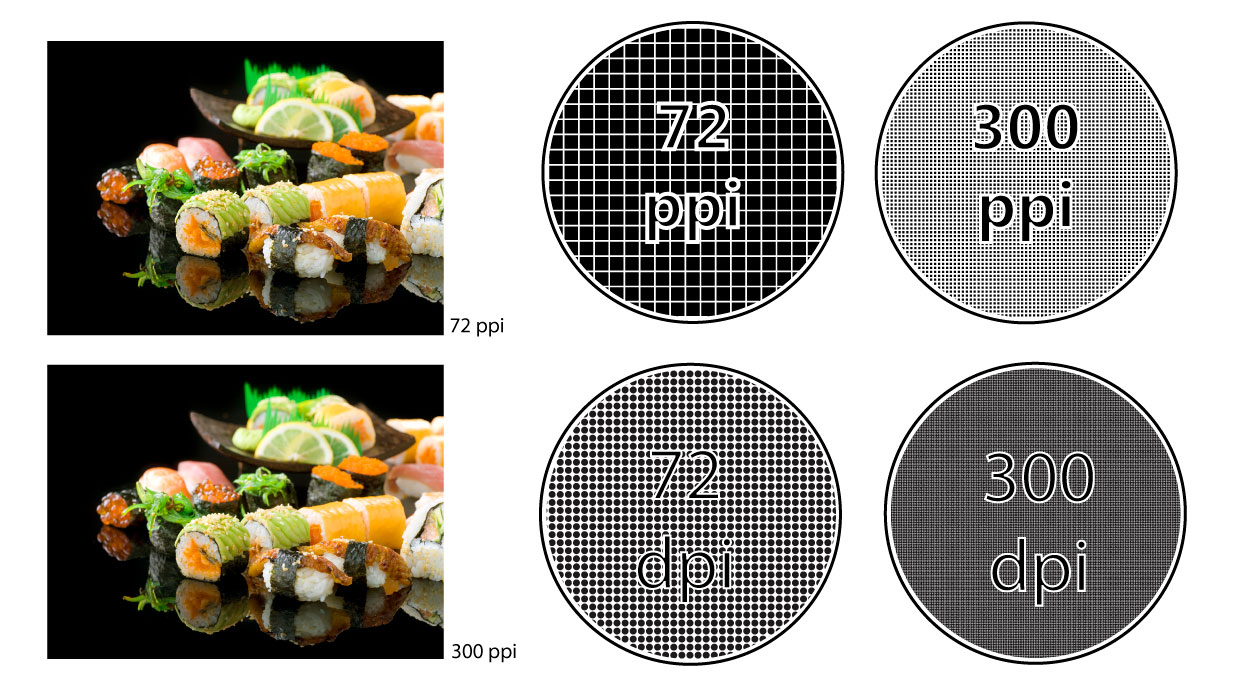
At the risk of oversimplification, it can be useful to think of PPI as the data input and DPI as the expected output. Pixels are not converted to dots in a one-to-one basis. It’s possible to print something at nearly any PPI into any DPI. The difference is a low PPI image will still look blurry even when the print density is set to a high DPI. The higher the PPI the more information the printer will have to convert into “dots.” You want your PPI to be as high as you can get away with, without “upsizing” your image from your application.
Images with a low PPI may look fine on a monitor, but look terrible when printed using the same number for DPI. Generally speaking, your PPI should be as close to your intended DPI as you can get away with. However, larger PPI often means a larger file size. You may want your PPI lower for a more manageable file. Indeed, there may be no perceptible loss in quality either, depending on the specific design and the expected viewing distance of the final print.
Effect of DPI on Images
At its very core, most forms of colored printing have not changed in the past hundred years. Each hue we see in print is actually made up of tiny dots and splotches of only a few colors. The industry standard today is four colors: cyan, magenta, yellow and black ( CMYK ). Black is often designated “K”, for “key color.”
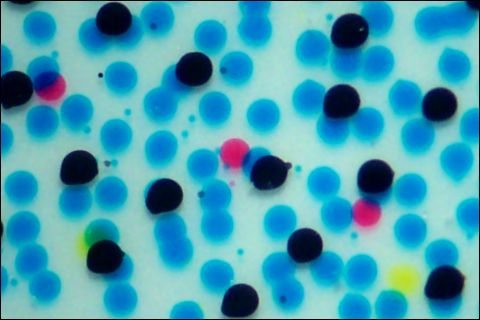
These colors are combined by printers in such a way that our eyes perceive them to be any of millions of different hues. When you place a conventionally printed image under a microscope, you will find discrete dots of cyan, magenta, yellow, and black rather than the color you actually see when viewing the print normally.
Check out the dots of CMYK when we look at this business card from the British Library under a microscope.
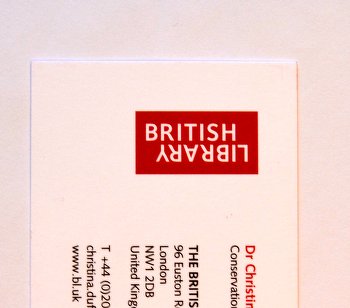
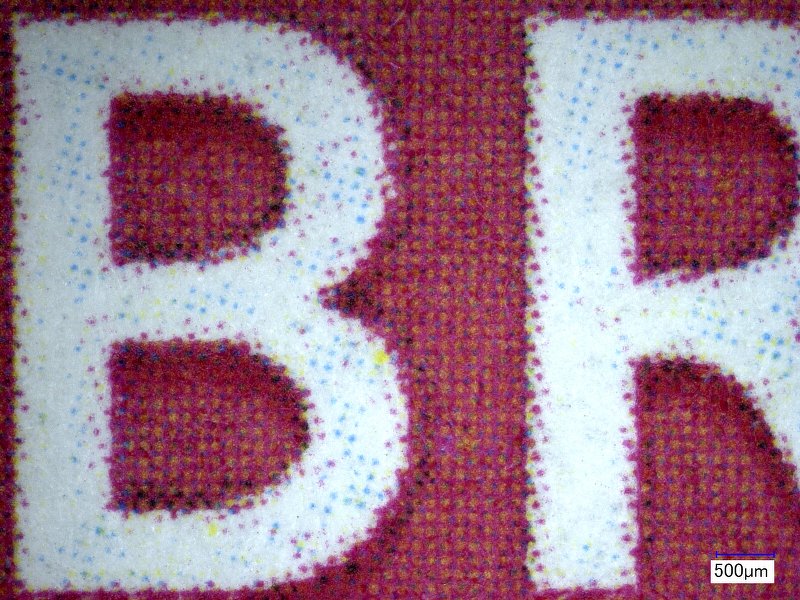
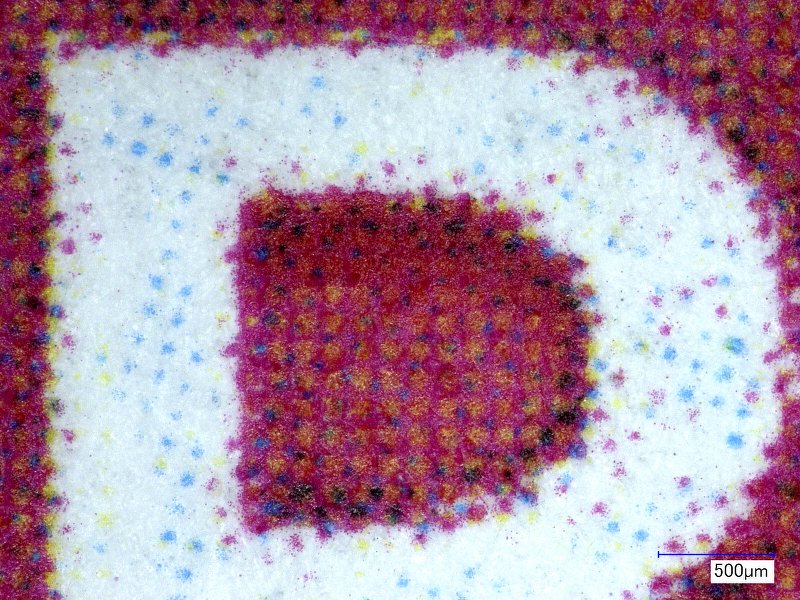
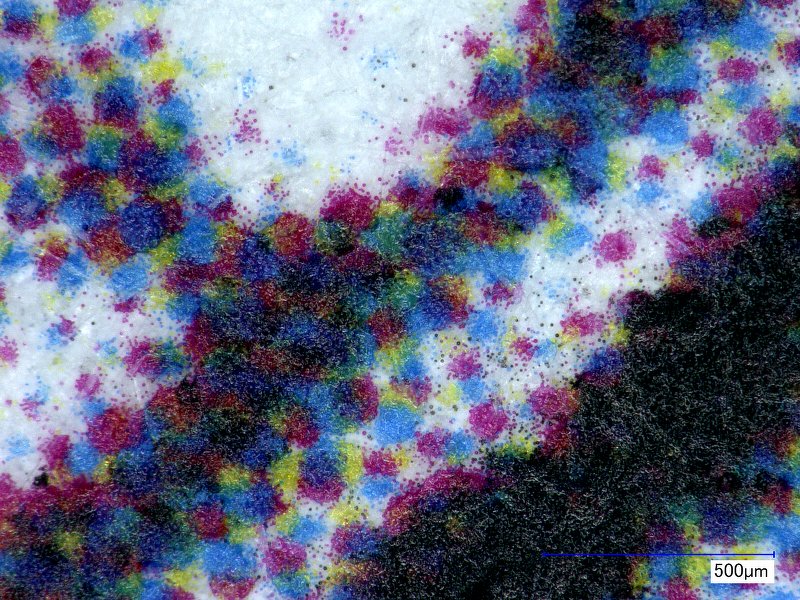
In practical terms, a higher DPI will instruct the printer to print more dots per square inch, resulting in sharper images, and more perceptibly distinct colors. Supposing we’re talking about a same-sized print, a low DPI will generally result in blurry printed images, as the resulting “dots” or splotches made by the printer will be larger or less distinct. On the other hand, DPI settings will have zero effect on an image on screen, as this is determined by PPI .
PPI Is Still Important for Print
But while DPI has no effect on on-screen image quality, PPI is still important for print images. Your image’s input PPI has to be large enough to avoid unwanted pixelation. You can avoid PPI issues by using vectors for images whenever possible. Vectors are mathematically plotted outlines and shapes. They retain sharpness regardless of how much they are enlarged.
Rasterized images (images made of pixels) such as photos need to have their PPI match the output DPI as close as practical in order to get the best possible results. If the image’s PPI is too low, the resulting print will be of poor quality regardless of how high your DPI is.
The reason we recommend vector image files when possible is because they take PPI out as a factor that can make your prints blurry. For this reason, it’s always best to have your text and important brand elements such as logos as vectors. This will prevent any loss of quality and legibility in case you have to enlarge them. If you need to send a rasterized image, be sure that the PPI is as high as is practical.
Why 300 DPI?
Generally speaking the higher the number, the better the print quality. However, the human eye will not generally see much, if any difference in printed image quality past 300 DPI. This is especially true if the stock used is particularly absorbent. Given that there are 90,000 dots of pigment per square inch of print in 300 DPI image, you’re already packing in a significant amount of detail as it is.
The 300 figure has been an industry standard since the 90’s. This was partly due to equipment limitations. A few argue that a 300 DPI setting is an outdated concept. On the other hand, the 300 standard continues to persist because the human eye has not changed. 300 DPI is still a useful starting point for sharp prints. You might be able to get acceptable prints at a lower DPI. You might not be able to see any difference, especially if your design isn’t intended to be viewed up close. However, to preemptively avoid any potential loss in print quality, we recommend you set your files to 300 DPI or higher.
How to Format DPI Correctly With Popular Design Software.
Adobe Photoshop
- Click “File” and then “New.”
- Select “300” for the Resolution.
- Choose “Pixels/Inch” for the Units. ( We know we said it was DPI and PPI are different, but this is how you set it here.)
- Click “OK.”
Microsoft Publisher
- Click “File” and choose “Save As.”
- Select either “PDF” or “TIF” from the file-type menu.
- For PDF, click “Options” and select “Commercial Press” from the options; click “OK.”
- For TIF, click “Change” and click “High Quality Printing or Commercial Press,” then click “OK.”
Quark Xpress
- Click “File” and then choose “Export.”
- Under “Save as Type” select “PDF.”
- Under “PDF Style” choose a high quality PDF.
- Click “Save.”
(This will set the graphics to 300dpi and the color to CMYK.)
Corel Draw
- Click “File” and then “Export.”
- Select “PDF” as the file-type and then select “PDF for Prepress” as the PDF Style.
- You can also click “Settings” to specifically change the export settings.
- Use recommended settings. In our case, it’s 300dpi and CMYK color.
Resources for This Post:
- Tech Terms – DPI Definition
- Image Science – The Difference Between PPI and DPI
- Stack Exchange – Graphic Design – What is the difference between DPI (dots per inch) and PPI (pixels per inch)?
- Andrew Dacey Photography – DPI and PPI Explained
- 99 Designs – PPI vs. DPI: what’s the difference?
- WhatIS.com – Definition of Dots Per Inch
Did you find this article helpful? Comment below.
Arthur Piccio is a feature writer and subject matter expert for the PrintPlace Blog. In his spare time he studies guitar and writes about goats.


