
Give us a call M-F (6am-10pm CT), Sat-Sun (8am-7pm CT)

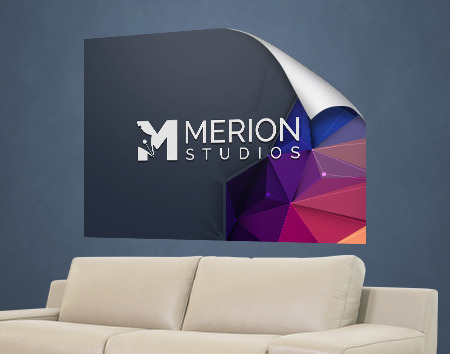
If you’re thinking about renovating your store or restaurant, what’s the first thing you’d change? For many business owners, updating the walls is a great way to create a more welcoming atmosphere.
Repainting your walls is certainly a creative option, but applying wall decals is a faster and more efficient process. In this article, we’ll go over the simple steps for installing new wall decals in your business.
Wall decals are a creative way to improve the look of your interior walls. If you are wondering why you should pick them instead of painting, here are some benefits they offer.
Given some of their benefits, you’ll certainly want to know how to properly apply decals to your wall. But first, there are some preparations you need to follow.
Before you put up a wall decal, take the time to check the surface where you want to place it. Most decals work best on smooth, clean indoor walls. While outdoor decals are available, they’re usually made for short-term use and hold up better in covered or shaded spots rather than out in the weather all the time.
You should also check the wall’s texture. Decals stick best to flat, plain walls and might not stay on rough surfaces like brick or stucco. Also, see if the wall is newly painted, matte, or damp. Make sure the wall is dry and ready before applying the decal. Try not to put decals on spots that often get wet.
If you often put decals in the same spot, notice how well the old ones stayed on and try to do the same with your new ones. Also, measure and mark where you want the decal so it will be straight, centered, and easy to apply.
Step 1: Clean and Prepare the Wall
Start by cleaning the wall so the decal will stick well. Remove any dust, dirt, grease, or leftover adhesive from old decals. Use a damp cloth to wipe the wall, then dry it completely with a clean, lint-free cloth.
Step 2: Peel and Position the Decal
Gently peel back the top part of the backing paper to reveal the adhesive. Fold the backing under, so it is easier to hold. Line up the decal with your guide marks, then press the exposed adhesive part onto the wall. Make sure everything is straight before you continue.
Step 3: Press the Decal from Top to Bottom
After you secure the top, gently peel the rest of the backing while pressing the decal onto the wall. Use a squeegee or a soft, dry cloth to smooth the decal from top to bottom. Make sure the graphic stays aligned as you work your way until the full decal is applied.
Step 4: Smooth Out the Surface, Then Inspect the Wall
After the decal is fully applied, go over the entire wall again, pressing it down with a squeegee or cloth using firm, even pressure. Afterward, check the finished decal for bubbles, wrinkles, or uneven edges.
Step 5: Make Final Adjustments
The final step is to address all installation issues. Try popping the air bubbles formed with a small needle and smooth out the surface. If the decal is slightly misaligned, carefully lift and reposition it. Finish by gently wiping the surface with a clean, dry cloth to keep it looking vibrant.
Attractive walls can help any business create a welcoming atmosphere that customers remember. The right wall decals make it easy to update your space, show off your brand, and improve your overall look. If you run a retail store, restaurant, cafe, or any other business, PrintPlace is here to help you bring your ideas to life. Just upload your artwork or design something new, and we’ll print high-quality wall decals that are ready to install and impress your visitors.
PrintPlace’s mission is to provide customers with unparalleled printing services through the knowledge and expertise of its employees.