
Planning an event comes with a lot of moving parts, and printed materials are easy to overlook until deadlines start getting close. From invitations and banners to programs and directional signs, each piece needs to be designed, approved, printed, and delivered on time.
This event printing checklist will help you figure out what to print, when to order it, and how to keep everything organized from planning through setup day.
Plan Printed Materials Around the Attendee Journey
Start with the attendee journey. Think about how people will discover the event, register, find their way around the venue, and follow the schedule. Every printed piece should have a clear purpose.
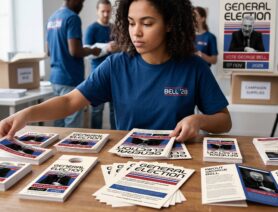
You may need invitations, postcards, flyers, posters, or banners to promote the event; signs to help attendees navigate the venue; and handouts, such as agendas, speaker bios, and maps, for reference throughout the day.
Once you've created a list of everything you need, build your event printing budget. This will help you prioritize materials and make informed decisions about quantities, sizes, and formats.
Track Every Printed Piece in One Checklist
Keep all your event materials in one shared checklist or spreadsheet. Give each item a specific name, such as "Main Entrance Welcome Banner" or "Second-Floor Session Directory." Avoid broad labels like "banners" or "signs," which can make it difficult for your team to track approvals, orders, and installation locations.
For large conferences or venues, creating a signage inventory is particularly helpful because it makes setup easier and ensures every sign ends up in the right place.
For each item, record:
- Purpose and location
- Size, specifications, and quantity
- Designer or artwork owner
- Final approver
- Content due date
- Artwork due date
- Approval deadline
- Required delivery date
- File location
- Order status
Helpful Tip: Keep a note on how you calculate each quantity. Program counts may be based on attendance, while sign counts usually depend on the venue layout.
Create a Timeline for Event Printing
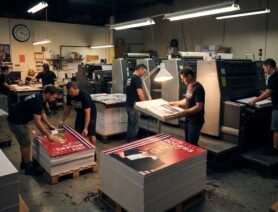
You'll need time not only for printing, but also for delivery, inspection, sorting, and installation. Proper planning helps ensure materials arrive on time and gives your team a chance to catch any issues before attendees arrive.
Start by confirming when the venue will accept deliveries and when your team can access the space for setup. Then factor in production and shipping separately. An item's production time doesn't always reflect when it will arrive.
Next, set a proof approval deadline. Leave enough time for reviewers to check the artwork and for designers to make revisions.
Keep in mind that different products may have different turnaround times. For example, a booklet may require more production time than a banner. Check current production and shipping estimates before finalizing your schedule.
Helpful Tip: Build a buffer whenever possible. Materials needed for registration or wayfinding should arrive well before setup begins, giving you time to address any unexpected issues.
Ways to Manage Event Information Changes
Event details can change throughout the planning process. A few simple steps can help you stay organized, keep printed materials accurate, and avoid last-minute reprints.
- Approve stable details early. Finalize items that are unlikely to change, such as event branding and design elements, before moving on to schedules, speaker bios, and sponsor acknowledgments.
- Set clear content deadlines. Make sure contributors know when information is due and when changes can no longer be made without affecting production.
- Collect sponsor materials early. Request approved logos, brand guidelines, and final approvals as soon as possible to avoid last-minute issues.
- Keep one approved file for each item. Store the latest version in a shared folder, so everyone is working from the same file.
- Update all affected materials. A change to a room assignment or session time may require updates to programs, maps, agendas, and directional signs.
- Use QR codes for changeable information. Link to an event webpage that can be updated after materials are printed.
- Contact your printer right away if changes occur. The sooner you check the order status, the more options you may have for making corrections.
Pre-Print Approval Checklist
Review content and print requirements separately to catch errors before production.
Content Check
Confirm that these details are accurate and consistent:
- Event name, date, and location
- Speaker information
- Session times and room assignments
- Sponsor names and logos
- Schedules, maps, and directions
Print Check
Make sure the file meets printing requirements:
- Correct size and orientation
- Bleed and safe areas included
- High-resolution images
- Correct page order (for booklets)
- Readable text and graphics
Final Review
Before approving:
- Test all QR codes
- Check that links work on mobile devices
- Consolidate reviewer feedback
- Assign one person to give final approval
Helpful Tip: A single approver helps prevent conflicting feedback and ensures the correct file goes to print
Prepare for Delivery and Setup
Before event day, make sure your printed materials arrive where and when they're needed.
- Confirm delivery details with the venue, including receiving hours and package instructions.
- Inspect materials on arrival for damage, quantity, and print accuracy.
- Sort items by location to make setup faster.
- Use your inventory during setup to track placements and identify anything missing.
- Walk the attendee route before the event starts to make sure signs and directions are clear.
Helpful Tip: Label boxes by setup area, such as Registration, Main Stage, or Exhibit Hall, to save time during setup
Frequently Asked Questions
No. Production time is the time it takes to print your materials, while delivery time includes shipping and receiving, so your order may arrive later than the production estimate. Always factor in both when planning your schedule.
Finalize all information that will appear in the program, including schedules, speaker details, room assignments, and sponsor information. If any details may change later, have a plan for sharing updates, such as a QR code that links to the latest event information.
It depends, as the right quantity is based on attendance, staff needs, and distribution plans. Review the estimate regularly and adjust it as registration numbers change.
Contact your printer right away to see if changes are still possible. Then update any related printed and digital materials to keep information consistent.
Bring Your Event Materials Together
A well-planned event printing checklist can help you stay organized, avoid last-minute issues, and keep attendees informed from start to finish. When you're ready to print, explore PrintPlace’s booklet printing, signs, and banners to help promote your event, guide attendees, and share important information throughout the venue.