
Give us a call M-F (6am-10pm CT), Sat-Sun (8am-7pm CT)

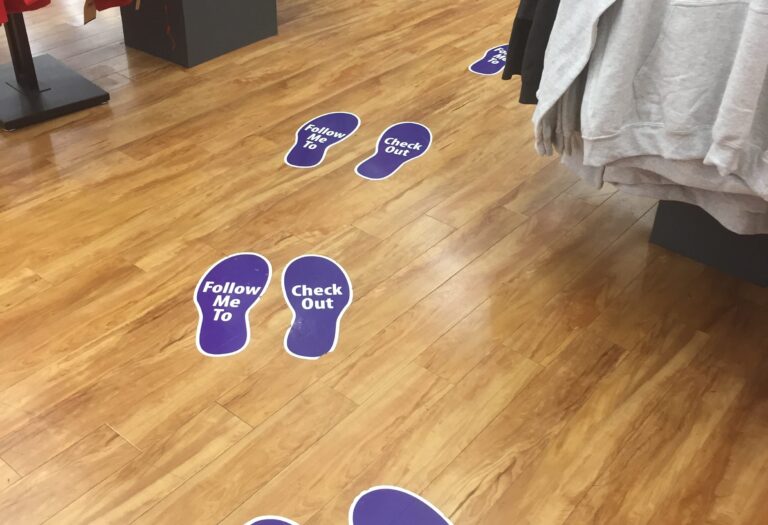
Floor graphics serve a variety of purposes — from directing foot traffic and capturing customers’ attention to reinforcing your brand. To achieve a professional appearance and long-lasting performance, proper installation is essential.
This guide provides step-by-step installation instructions and practical tips to help you apply floor graphics with confidence.
Before you begin, gather the following materials:
Floor graphics adhere best to these floor surfaces:
By contrast, certain floor types and conditions prevent graphics from adhering and curing properly. Avoid installing graphics on these surfaces:
Make sure the floor is dry, smooth, and free of dirt, dust, grease, and wax before installation. Remove any residue or grime using a mild floor cleaner or isopropyl alcohol (except on unsealed or waxed wood floors).
Avoid using silicone-based cleaners or products that leave behind a protective coating, which can prevent the adhesive from bonding properly.
Without removing the backing paper, place the graphic where it will be installed. Use a measuring tape to ensure proper alignment, and secure one edge with masking tape to keep the graphic aligned during installation.
Lift the graphic and slowly peel away a few inches of the backing paper, so you can lay the adhesive onto the floor. Use a squeegee to apply firm pressure from the center outward to remove air bubbles and prevent wrinkles.
Small air bubbles can usually be pushed toward the edges using a squeegee. But for stubborn ones, use a pin to make a tiny hole and press the trapped air out.
Firmly press around all edges to ensure full adhesion. If you’re installing the floor graphics in a cool environment, gently warming the vinyl with a heat gun can help improve adhesion.
While many floor graphics are ready for light foot traffic immediately after installation, allowing the adhesive to cure for at least 24 hours improves adhesion. During this time, avoid heavy foot traffic and wet cleaning.
To keep your floor graphics looking their best and performing longer, follow these best practices:
Proper installation is only part of the equation — choosing the right floor graphic material is just as important for ensuring long-lasting performance. Different floor types and levels of foot traffic require different solutions, so selecting the right material is key to your floor graphics’ long-term durability and performance.
Vinyl and aluminum floor decals are two of the most popular options. In general, vinyl decals are ideal for indoor applications, while aluminum decals are better suited for high-traffic areas and outdoor use. Check out this side-by-side comparison to help you decide whether vinyl floor decals or aluminum floor decals suit your needs.
| Feature | Vinyl Floor Decal | Aluminum Floor Decal |
|---|---|---|
| Material | Flexible adhesive vinyl | Rigid aluminum plate |
| Best For | Indoor promotions, retail displays, temporary events, and directional signage | High-traffic indoor and outdoor areas, warehouses, factories, and sidewalks |
| Durability | Good for light to moderate foot traffic | Excellent for heavy foot and equipment traffic |
| Weather Resistance | Primarily designed for indoor use | Designed to withstand rain, sunlight, snow, and temperature changes |
| Surface Compatibility | Smooth floors such as tile, sealed concrete, laminate, vinyl, hardwood, and low-pile carpets (e.g., commercial carpets with short fibers often used in office settings) | Concrete, asphalt, brick, stone, and other rough or textured surfaces |
| Typical Applications | Retail promotions, event branding, social distancing markers, and indoor wayfinding | Safety signage, industrial facilities, parking areas, campuses, transit stations, and outdoor wayfinding |
Choose vinyl floor decals if you need:
Choose aluminum floor decals if you need:
Do I need a professional to install floor graphics?
Not necessarily. Most floor graphics are designed for easy DIY installation that you’ll only need basic tools like squeegee, masking tape, and measuring tape.
Can floor graphics be applied to any type of floor?
No. Floor graphics work best on smooth, clean, sealed surfaces such as tile, vinyl, laminate, smooth hardwood, and sealed concrete. They are not recommended for wet surfaces, loose carpeting, heavily textured floors, or damaged flooring.
Can my customers walk on floor graphics immediately after installation?
Many floor graphics can handle light foot traffic immediately after installation. However, allowing the adhesive to cure for at least 24 hours before exposing the graphics to heavy foot traffic or wet cleaning provides the best long-term adhesion.
How do I prevent air bubbles when installing floor graphics?
Peel the backing paper and apply the graphic gradually with a squeegee from the center outward. For stubborn bubbles, use a pin to create a small hole and press the trapped air out.
With proper surface preparation, precise alignment, and careful application, your floor graphics will maintain a smooth, professional appearance while withstanding the demands of daily foot traffic.
Ready to create custom floor graphics for your business? Explore PrintPlace.com’s vinyl and aluminum floor decals designed for retail stores, offices, events, and more. With vibrant printing, long-lasting materials, and fast turnaround times, it’s easy to bring your message right where your customers walk.
PrintPlace’s mission is to provide customers with unparalleled printing services through the knowledge and expertise of its employees.