
Key Takeaways: What Signs Does a Conference Need?
Identification signs confirm destinations, such as registration areas, entrances, and session rooms.
Directional signs guide attendees between locations and route decision points.
Informational signs provide schedules, maps, directories, and other event details.
Sponsor recognition signs fulfill sponsorship commitments and support event branding.
Planning an event comes with a lot of moving parts, and printed materials are easy to overlook until deadlines start getting close. From invitations and banners to programs and directional signs, each piece needs to be designed, approved, printed, and delivered on time.
This event printing checklist will help you figure out what to print, when to order it, and how to keep everything organized from planning through setup day.
1. Map signage to the attendee journey.
Start where attendees first arrive and follow their path through registration, sessions, exhibits, and other event spaces. View the route through a first-time attendee's eyes, so you wouldn’t miss anything.
The general recommendation is to place signs before turns, elevators, escalators, and other decision points, and use confirmation signs along longer routes.
For example, an attendee may need one sign near registration, another at the elevators, and a room sign at their destination. Finally, walk the route in both directions to make sure attendees can find their way there and back.
2. Create a conference signage inventory.
Turn your journey map into a list of signs and locations. For each sign, record:
- Location and message
- Size, quantity, and display method
- Owner, approver, and file version
- Delivery and installation details
Mark signs on the floor plan to spot gaps and guide setups. Use the same names across all signs to avoid confusing attendees.
Once your inventory is ready, use this Event Printing Checklist to help keep everything on schedule and ensure every sign arrives where it's needed.
3. Choose a sign format for each location.
Choose the format after establishing the sign’s purpose and placement. Consider how much information it must carry, how far away people will view it, and what the venue allows you to install.
For example, a foam board sign may suit an indoor session directory or sponsor display, while a banner might be an ideal choice for a welcome message or a larger branding placement. Make sure the sign's intended use, dimensions, and hardware fit the space where it will be displayed
4. Design clear, easy-to-follow signs.
Clear, consistent signage helps attendees find their way quickly and confidently. Use these design tips to make every sign easy to read and understand:
- Make the destination and arrow easy to spot. Keep supporting information brief.
- Use the same fonts, colors, arrow styles, and naming conventions throughout the event.
- Repeat visual cues so attendees can quickly recognize and understand your signs.
- Choose text size and spacing based on viewing distance.
- Review designs at their actual size and, if possible, test a sample in the event space.
- Use strong contrast between text and background.
- Avoid patterns, photos, or decorative elements that compete with the message.
- Keep maps simple and task-focused.
5. Make room for sponsors and directional signs.
Plan sponsor recognition alongside wayfinding signs with these practical tips:
- Review the sponsor agreement before assigning placements.
- Confirm required assets, approved logos, sizing guidelines, and approval steps.
- Assign someone to review and approve each sponsor sign.
- Keep sponsor branding separate from the main directional message.
- Make sure attendees can identify the destination at a glance.
- Use dedicated sponsor boards or banners for larger recognition displays.
- Place sponsor displays where attendees can see them without blocking walkways.
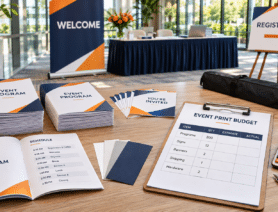
- Plan sponsor signage within your print budget by accounting for all related expenses, including display hardware, installation materials, production quantities, shipping, and setup.
6. Plan for changing information.
Finalize "stable" or "evergreen" signs early, such as welcome messages, general directions, and event branding. For details that may change—like room assignments and session times—set content deadlines and verify the information before approving artwork.
Use printed room signs alongside an agenda on your event website or screens. If you include a QR code, add a short web address and test both before printing.
When details change, review the entire route. Updating the sign outside a room won’t help if the lobby directory still points attendees in the wrong direction.
Some signs can be finalized early. Welcome messages, general directions, and event branding may remain the same while room assignments and session details may change.
7. Check the venue before guests arrive.
After installation, ask someone unfamiliar with the venue to find registration, a session room, and the exhibit area using the signs alone. Pay close attention to where they hesitate or need to ask for direction.
Next, check that doors, freestanding displays, and queues aren’t blocking the signs; confirm that wayfinding signs point in the correct direction; and verify that all room names and details are accurate.
Record any corrections in the inventory and save notes for future events. Consider taking a photo of each installed sign to document its placement and give the next planning team a clear reference.
Frequently Asked Questions
Place them where attendees can read them before making a route decision, such as an intersection, corridor entrance, or transition between floors.
It depends on several factors, including the venue layout, attendee routes, and number of destinations. The general recommendation is to count the points where people need direction or confirmation, then check for gaps during a walkthrough.
Not necessarily. Follow the event’s sponsorship commitments and the design plan. If a sign needs sponsor logos, place them where they will not compete with the main message or make the sign harder to read.
Use printed signs for information guests need at a glance, such as destinations, directions, and key instructions. Put changing schedules and additional details on an easily accessible event webpage that you can update as needed.
Make Every Sign Count
Good conference signage helps attendees find their way with confidence. Map the attendee journey, give each sign a clear purpose, and choose formats that fit the space.
Use concise messages, consistent designs, and clear directional cues. Plan sponsor branding without compromising readability, then walk around the venue before the event to confirm every sign is visible, accurate, and easy to follow.
Ready to print? PrintPlace offers custom banners, foam board signs, and other event signage to help you create a smooth, professional attendee experience.