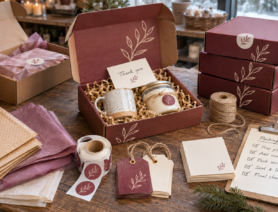

Running a gift shop means every package represents your brand. Whether you're sending a handmade item across the country or fulfilling a last-minute gift order during a busy season, customers expect their purchase to arrive safely, look presentable, and feel special when it's opened.
This checklist covers the key packaging and shipping details to review before an order leaves your shop, helping you prevent mistakes, protect products, and create a better experience for both the buyer and the gift recipient.
1. Check the order before you pack.
Before you start packing, make sure the product, quantity, recipient name, and shipping address match the order details. If the customer includes a gift message, double-check the spelling and confirm it's going into the right package.
It's also a good idea to check what information will be visible to the recipient. Gift recipients often appreciate product details or care instructions, but they don't need to see pricing or payment information. However, keep those records available for your team without including them in the package.
If you offer different gift wrapping or packaging options, use clear names in your packing instructions. For example, "Blue Birthday Gift Box with Gift Message" is much easier to identify than a generic note like "gift wrap requested” to help your team pack orders accurately, especially during busy periods.
2. Prioritize product protection.
Start by choosing a box or mailer that fits the item and leaves enough room for protective packing materials. Even the most beautiful packaging won't matter if the product arrives damaged.
It's worth testing your packaging before using it for customer orders. Pack a sample gift, close the box, and gently turn it in different directions. If anything shifts or rattles, add more cushioning or choose a better-fitting package. For fragile items, make sure separate pieces can't bump into each other during shipping.
Once everything is secure, arrange the inside of the package so it opens neatly. Keep gift messages, cards, and decorative elements visible instead of hiding them beneath packing materials.
3. Put the buyer’s message front and center.
A personal message is often one of the most important parts of a gift order, so it should be easy for the recipient to spot right away. The general recommendation is to place a gift card on top of the wrapped item or inside the box.
Use a consistent format for gift messages and decide how your team will handle orders that don't include one. If a customer leaves the message field blank, avoid adding your own note on their behalf.
Keep your shop’s message separate from the buyer’s. A short thank-you note or a branded card insert can preserve the personal feel of the gift while making the buyer’s message clear and easy to find.
You can also use gift tags, stickers, and hang tags to organize information. For example, a gift tag can identify the recipient, while a hang tag can include product details or care instructions.
4. Give every printed piece a purpose.
Before adding a card, tag, sticker, or insert, ask yourself what purpose it serves. Think about the information a recipient might need, such as:
- Product care instructions
- Material information
- The maker's story
- Gift identification for multi-item orders
- A thank-you message from your shop
Your customers shouldn’t have to scan a QR code just to learn how to care for a handmade item. Although digital channels are useful for additional details, the most important instructions or essential information should be readily accessible and easy to find in the packaging.
If you’re just starting out, choose a few versatile printed materials (such as cards, labels, and tags) to create a consistent brand experience across products without customizing every package or exceeding your budget. Read Budget-Friendly Packaging for Small Gift Shops to learn more.
5. Create a packing process that is easy and repeatable.
A simple packing process helps every order look consistent, even during busy seasons. For each gift order you sell frequently, create a short packing guide for these popular packaging supplies and materials:
- The box or mailer size
- The protective materials to use
- The printed pieces to include
- The order in which everything should be packed
- A photo of the finished package
Next, follow these steps to ensure the packaging reflects your brand, protects the product, and meets shipping requirements:
- Secure the item inside the package.
- Attach the product tag.
- Place the gift message on top.
- Seal the package and check the shipping label.
Quick Tip: Update your packing guides and reference photos whenever seasonal gift box contents change.
6. Review the package before shipping.
Before sealing the package, take a final look at it from the recipient's perspective. To ensure you don’t miss anything important, ask yourself these questions:
- Is the item protected and ready for shipping?
- Is the correct gift message included?
- Are product details and care instructions easy to find?
- Does the package close properly without squishing the contents?
- Does the shipping label match the order?
If you’re specifically preparing for holiday rush orders, check out this Holiday Gift Shop Packaging Checklist.
Send Every Gift With Confidence
A thoughtful gift can lose its impact if it arrives damaged, missing a message, or packed with confusing information. Use this checklist to create a consistent process that protects each product, keeps your team organized, and helps every package feel personal from the moment it arrives.
PrintPlace can help you create cards, tags, stickers, and other branded materials that support a polished and memorable unboxing experience.