
Give us a call M-F (6am-10pm CT), Sat-Sun (8am-7pm CT)

Things You’ll Need
Step-by-Step Setup Instructions for Your Tabletop Banner
Troubleshooting Common Tabletop Banner Issues
How to Take Down a Tabletop Banner
Frequently Asked Questions
Stand Out at Your Next Event
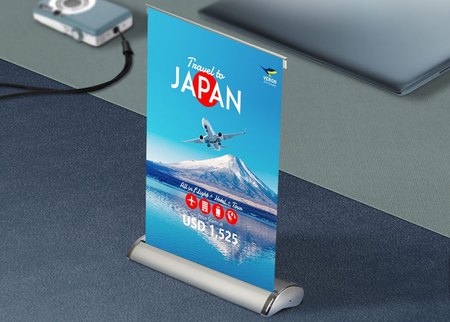
This guide outlines the step-by-step process for setting up a tabletop banner to help achieve a professional, visually appealing display at your events.
Remove all components from the carrying case and inspect them to ensure they are free from damage. Pay particular attention to the following:
Place the banner base securely on a flat, level tabletop, and keep it several inches away from the edge of the table to reduce the risk of tipping.
Connect the pole sections and ensure each one locks securely into place, forming a straight, stable pole.
Attach the support pole to the slot on the banner base, ensuring it is firmly stable with no wobbling or movement.
Carefully pull the banner graphic upward from the base, keeping the motion slow and even. Avoid twisting the graphic or pulling it forcefully if you encounter resistance.
Secure the top of the banner graphic to the support pole or crossbar, ensuring the banner is centered, fully extended, and securely fastened.
Inspect the display to ensure the banner is upright, the graphic is smooth and wrinkle-free, all branding and messaging are clearly visible, and the banner is positioned for maximum visibility.
Use this checklist to ensure your banner display is event-ready.
Banner graphic present
Banner base present
Support pole(s) present
Crossbar present
Carrying case available
Base positioned securely
Pole fully assembled
Pole attached securely
Banner fully extended
Banner attached correctly
Graphic is straight
No wrinkles or creases
No visible damage
Branding is clearly visible
Banner is stable and secure
If you encounter any issues during setup, use the troubleshooting tips below to quickly identify the cause and restore your banner to a professional display condition.
Banner does not fully extend: This may occur if the graphic is caught in the base, the pole is not fully assembled, or the banner twists during extension. Carefully retract the banner, verify the pole is assembled correctly, and extend the graphic slowly and evenly.
Banner appears crooked: This is often caused by an uneven top attachment or a pole that is not fully seated in the base. Reattach the banner to the top fitting, ensure the pole is securely inserted, and realign the graphic.
Banner leans or wobbles: An uneven tabletop, loose connections, or improper base placement can affect stability. Move the banner to a level surface, tighten all connections, and position the base away from table edges.
Visible wrinkles on the banner: Wrinkles may result from improper storage or an incompletely extended graphic. Leave the banner fully extended for a short period, roll it after use, and avoid folding the graphic.
Proper banner care extends beyond setup. Learn how to disassemble and store your tabletop banner correctly for future use.
How long does the setup take?
Most tabletop banners can be assembled in 2–5 minutes.
Can one person set up the banner?
Absolutely! Most tabletop banner systems are designed for single-person setup.
Can the banner be used outdoors?
Tabletop banners are designed primarily for indoor use. If used outdoors, place them in a sheltered area and protect them from wind, rain, and other weather conditions.
How should the banner be stored?
Retract the graphic, disassemble components if necessary, and store them in the provided carrying case.
What should I do if the graphic gets dirty?
To keep your banner looking its best, remove dust with a soft, dry cloth. If deeper cleaning is needed, use only manufacturer-approved cleaning products.
How can I make the banner more visible?
Place it at eye level (5–6 ft up), clear of obstructions, and use high-contrast colors with legible, large text. Good lighting and high-traffic locations (entrances, checkout areas) also help.
A properly assembled tabletop banner creates a polished, professional presentation and helps prevent common setup issues. By following the recommended setup, maintenance, and storage practices outlined in this guide, you can keep your banner in excellent condition and ready for use whenever you need it.
Whether you’re exhibiting at a trade show, highlighting a promotion, or enhancing an in-store display, PrintPlace custom tabletop banners offer a simple, effective way to showcase your message and make a lasting impression.
PrintPlace’s mission is to provide customers with unparalleled printing services through the knowledge and expertise of its employees.